Welcome to the Kenmore Ultra Mini Sewing Machine Owners Manual! This comprehensive guide provides essential information to help you understand, operate, and maintain your machine effectively.
From threading and tension adjustment to troubleshooting and maintenance, this manual ensures you get the most out of your sewing experience with the Kenmore Ultra Mini.
1.1 Product Overview
The Kenmore Ultra Mini Sewing Machine is a compact, portable sewing solution designed for small-scale sewing projects. It features 12 built-in stitches, including straight, zigzag, and decorative options, making it versatile for various fabrics. Weighing just 5 pounds, it’s easy to carry and store. The machine includes an automatic needle threader, reducing eye strain and saving time. Ideal for beginners and hobbyists, it comes with a sewing kit containing bobbins, needles, and a carrying case. Its user-friendly design ensures smooth operation, while the affordable price makes it a great addition to any sewing collection. Perfect for quick repairs, crafting, or small DIY projects.
1.2 Key Features of the Kenmore Ultra Mini Sewing Machine
The Kenmore Ultra Mini Sewing Machine is designed for convenience and versatility, offering 12 built-in stitches for various sewing tasks. It features an automatic needle threader, adjustable stitch length, and a LED light for better visibility. The machine includes a detachable arm for easy handling of small projects and a sturdy metal frame for durability. Weighing just 12 pounds, it’s portable and ideal for beginners or crafting on the go. Additional features include a free arm for sewing cuffs and sleeves, a bobbin winder, and a built-in carry handle. The machine comes with a sewing kit, bobbins, and a dust cover for added convenience.
Safety Precautions and Warranty Information
This manual includes a 90-day warranty and essential safety tips. Always mention the model and serial numbers for service inquiries. Use the rotary wheel to move the needle; avoid pressing or pulling it directly.
2.1 General Safety Guidelines
To ensure safe operation, always follow these guidelines:
– Unplug the machine when not in use or before cleaning.
– Keep the machine out of reach of children and pets.
– Avoid sewing near water or in humid environments.
– Use the correct power source as specified in the manual.
– Never touch sharp parts like needles or cutters with bare hands.
– Always turn off the machine before making adjustments.
– Regularly inspect the machine for damage or wear.
– Keep loose clothing and long hair tied back while sewing.
– Avoid sewing over pins to prevent accidents;
– Follow all instructions carefully to maintain safety and functionality.
Consult the manual if unsure about any procedure.
2.2 Warranty Details and Terms
The Kenmore Ultra Mini Sewing Machine is backed by a limited 90-day warranty covering manufacturing defects. This warranty ensures repairs or replacements for defective parts when used as intended.
For warranty claims, contact Kenmore customer support with your model number and proof of purchase. Improper use or maintenance may void the warranty. Register your product online for extended support and updates.
Refer to the manual for full terms and conditions to maintain warranty validity and ensure optimal performance of your sewing machine.
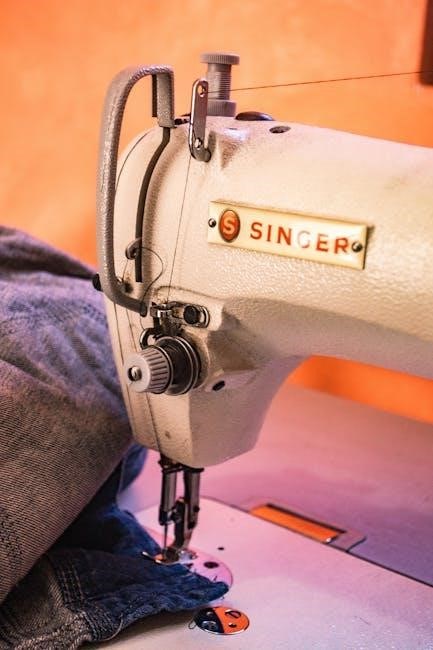
Understanding the Machine Parts
Identify key components like the spool pins, bobbin area, stitch selector, and power controls. Locate these parts as shown in the diagrams for easy reference.
3.1 Identifying Key Components of the Sewing Machine
Understanding the components of your Kenmore Ultra Mini Sewing Machine is essential for effective operation. Key parts include the spool pins for holding thread, tension dials for adjusting stitch tightness, and the rotary wheel for manual needle control. The power button and stitch selector allow you to choose between different stitching options. Additionally, the bobbin compartment houses the bobbin, while the presser foot secures fabric during sewing. Familiarizing yourself with these components ensures smooth operation and helps you troubleshoot common issues efficiently. Proper identification of each part is crucial for maximizing the machine’s functionality and longevity.
3.2 Special Features of the Kenmore Ultra Mini
The Kenmore Ultra Mini Sewing Machine boasts several standout features that make it an ideal choice for hobbyists and crafters. Its compact and lightweight design allows for easy portability, while the built-in stitch options provide versatility for various sewing projects. The machine also features automatic thread tension, ensuring consistent stitching without manual adjustments. Additionally, the LED light illuminates the work area, improving visibility. Its cordless operation offers convenience, and the included accessories, such as multiple presser feet, enhance functionality. These features combine to make the Kenmore Ultra Mini a versatile and user-friendly sewing machine for both beginners and experienced sewists.
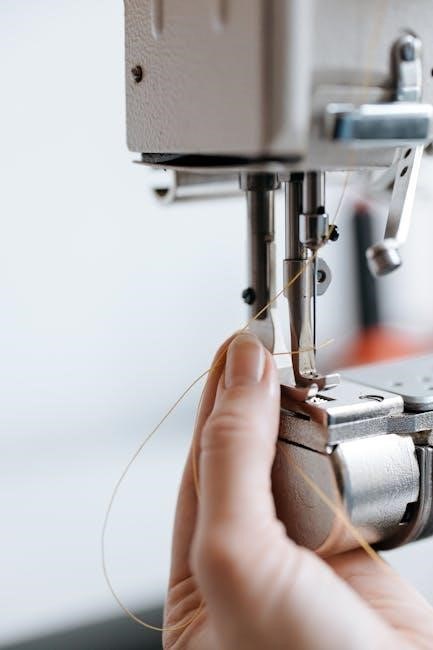
Threading the Machine
Threading the Kenmore Ultra Mini involves carefully guiding the thread through the spool pin, tension discs, and take-up lever before inserting it into the needle eye.
4.1 Step-by-Step Guide to Threading the Kenmore Ultra Mini
- Start by removing any leftover thread from the machine to prevent tangles.
- Place the spool of thread on the spool pin, ensuring it rotates smoothly.
- Guide the thread through the tension discs, keeping it taut but not overly tight.
- Pass the thread through the take-up lever and then through the needle’s eye.
- Gently pull the thread to set the tension and test by sewing a few stitches.
Always refer to the manual for specific threading diagrams and tension adjustment tips to ensure proper setup and avoid thread breakage.
4.2 Proper Bobbin Winding Techniques
Properly winding the bobbin is crucial for smooth stitching and optimal performance of the Kenmore Ultra Mini Sewing Machine. Start by cutting a small piece of fabric or stabilizer to use as a leader. Thread the machine and guide the thread through the bobbin winding guide. Gently wind the thread around the bobbin in a consistent, even layer, avoiding overlaps or loose winds. Once full, cut the thread and insert the bobbin into the machine, ensuring it seats securely. Always use the correct tension setting for the thread type to prevent tangles or uneven stitches. Properly wound bobbins ensure consistent stitching quality and reduce the risk of machine jamming. Regularly inspect and replace worn or damaged bobbins for best results. Always refer to the manual for specific tension settings and winding techniques recommended for your Kenmore Ultra Mini.
Adjusting Tensions
Proper thread and bobbin tension ensures balanced stitches. Adjust the upper thread tension by turning the dial clockwise or counterclockwise. Similarly, modify bobbin tension for optimal results.
5.1 Understanding Thread Tension
Thread tension is crucial for achieving consistent stitches on the Kenmore Ultra Mini. Proper tension ensures fabric lies flat and stitches are even. The machine features adjustable dials for both upper and bobbin threads. If tension is too loose, stitches may be uneven or looped. Conversely, overly tight tension can cause fabric to pucker or threads to break. Always test tension on a scrap fabric before sewing to ensure optimal results. Adjustments are made by turning the tension dials gently clockwise or counterclockwise. Refer to the manual for specific guidance on balancing tension for various fabrics and stitch types.
5.2 Adjusting the Tension for Optimal Stitching
Proper thread tension is crucial for consistent stitching. To adjust the tension, start by locating the tension dials on the machine. Gently turn the dial to increase or decrease tension. Always test stitches on scrap fabric before sewing your final project. If the stitches are uneven, tighten or loosen the tension accordingly. Ensure the bobbin thread is evenly wound and not tangled. Refer to the threading guide for proper setup. By fine-tuning the tension, you can achieve professional-looking results and prevent fabric puckering or loose stitching. Regularly check and adjust tension to maintain optimal performance.
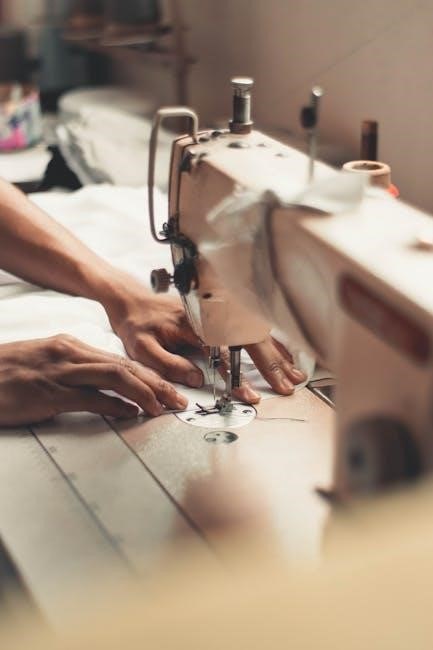
Basic Sewing Techniques
Master foundational sewing skills with the Kenmore Ultra Mini. Learn straight stitching, backstitching, and how to handle various fabric types effortlessly with its 12 built-in stitches.
6.1 Sewing Straight Stitches
To sew straight stitches on your Kenmore Ultra Mini, begin by threading the machine correctly and winding the bobbin. Set the stitch selector to the straight stitch option. Place your fabric under the presser foot, aligning the edge with the machine’s guide. Gently hold the fabric steady and press the pedal to start sewing. Keep the fabric moving at a consistent speed to maintain even stitches. Always use the appropriate foot for straight stitching to ensure accuracy. If the stitches are uneven, adjust the tension settings as needed for optimal results.
6.2 Sewing Backstitches
Sewing backstitches is essential for reinforcing seams, especially at the beginning and end of a stitch line. To sew backstitches on the Kenmore Ultra Mini, start by threading the machine and selecting the straight stitch option. Bring the needle down into the fabric, then gently pull the fabric backward while guiding it with your hands to create a few reverse stitches. Maintain even tension to ensure strong, secure stitches. Use the reverse stitch button if available for consistency. This technique prevents fraying and strengthens seams, ensuring durability in your projects. Always test on scrap fabric first for optimal results.
Troubleshooting Common Issues
Identify common problems like thread breakage, uneven stitching, or machine jamming. Understand their causes and solutions to restore smooth operation and maintain optimal performance. Resetting the machine often resolves issues.
7.1 Common Problems and Solutions
Encountering issues with your Kenmore Ultra Mini Sewing Machine? This section helps you identify and resolve common problems. Thread jams can occur due to improper threading; always follow the manual’s guidelines. Uneven stitches may result from incorrect tension settings or a misaligned bobbin. If the machine stops working, check for tangled threads or a full bobbin. To address these issues, turn off the machine, gently remove the thread, and restart. Regular cleaning and proper maintenance can prevent many of these problems. Refer to the troubleshooting guide for step-by-step solutions to ensure smooth operation.
- Thread jams: Gently remove thread and rethread properly.
- Uneven stitches: Adjust tension settings and ensure bobbin is correctly aligned.
- Machine stops working: Check for thread tangles or a full bobbin.
7.2 Resetting the Machine
Resetting your Kenmore Ultra Mini Sewing Machine can resolve various operational issues. Start by turning off the machine and unplugging it from the power source. Allow it to rest for 10 minutes to reset internal components. Plug it back in and turn it on. If issues persist, refer to the troubleshooting guide or consult a professional. Regular resets and maintenance can help maintain optimal performance and extend the machine’s lifespan. Always ensure the machine is cool before resetting to avoid damage. This simple process can often restore normal functioning and prevent more serious problems from arising.
- Turn off and unplug the machine.
- Wait 10 minutes to allow internal components to reset.
- Plug in and turn on the machine to test functionality.
Maintenance and Cleaning
Regular maintenance ensures optimal performance. Oil moving parts, brush the interior, and check for lint or thread remnants. Use a soft cloth to wipe the exterior clean.
8.1 Regular Maintenance Tips
Regular maintenance is crucial to ensure the longevity and optimal performance of your Kenmore Ultra Mini Sewing Machine. Start by oiling the machine periodically to keep moving parts lubricated and running smoothly. Use a soft cloth to wipe away dust and debris from the exterior and internal components. Clean the bobbin area thoroughly after each use to prevent thread buildup. Check for worn or loose parts and tighten them as needed. Store the machine in a dry, cool place when not in use. Refer to the manual for specific maintenance schedules and recommendations to keep your machine in top condition.
- Oil moving parts regularly for smooth operation.
- Clean the bobbin area and remove debris.
- Check for worn or loose parts and tighten them.
- Store the machine properly to avoid damage.
By following these tips, you can extend the life of your Kenmore Ultra Mini and ensure consistent stitching quality.
8.2 Cleaning the Machine
Regular cleaning is essential to maintain the performance of your Kenmore Ultra Mini Sewing Machine. Turn off and unplug the machine before cleaning. Use a soft, dry cloth to wipe down the exterior and remove any dust or debris. For internal areas, gently use a small brush or a cotton swab to clean around the bobbin case and needle area. Avoid using harsh chemicals or abrasive materials, as they may damage the machine’s finish; For stubborn thread residue, dampen a cloth with water, but ensure no moisture enters the machine’s internal components. Clean after each use to prevent thread buildup and ensure smooth operation.
- Turn off and unplug the machine before cleaning.
- Use a soft cloth for the exterior and a brush for internal areas.
- Avoid harsh chemicals; use a damp cloth carefully if needed.
- Clean after each use to prevent thread buildup.
Proper cleaning will help maintain your machine’s efficiency and extend its lifespan.
Accessories and Optional Parts
The Kenmore Ultra Mini Sewing Machine comes with essential accessories like bobbins, needles, and a sewing guide. Optional parts, such as additional bobbins, specialized needles, and a carrying case, are available for enhanced functionality.
- Included accessories: bobbins, needles, and a sewing guide.
- Optional parts: additional bobbins, specialized needles, and a carrying case.
These accessories help you customize your sewing experience and ensure optimal performance.
9.1 Included Accessories
The Kenmore Ultra Mini Sewing Machine comes with essential accessories to enhance your sewing experience. These include a set of bobbins, sharps sewing needles, a seam ripper, and a convenient carrying case. Additionally, a complimentary foot pedal and a power cord are provided for smooth operation. The machine also includes a bonus accessory kit with extra needles, a spool pin, and a darning plate. These accessories ensure you have everything needed to start sewing right away. Always verify the contents of your package to ensure all items are included for optimal performance and convenience.
9.2 Optional Accessories for Enhanced Functionality
Enhance your sewing experience with optional accessories designed specifically for the Kenmore Ultra Mini Sewing Machine. These include a variety of presser feet, such as zigzag, buttonhole, and zipper feet, to expand your stitching capabilities. Additional accessories like extension tables, carrying cases, and specialized needles can also improve efficiency and organization. Optional stitch pattern cards or embroidery hoops can unlock more creative possibilities. These accessories are tailored to maximize the machine’s versatility and cater to diverse sewing projects, ensuring you have the tools you need for every task. Explore the range to elevate your sewing skills and performance.
Advanced Sewing Techniques
Explore advanced sewing techniques with the Kenmore Ultra Mini, including working with various fabric types and utilizing built-in stitches for intricate designs and professional finishes.
Perfect your skills by mastering multiple stitch patterns and adjusting settings to accommodate different materials, ensuring precise and flawless results for every sewing project.
10.1 Sewing Different Fabric Types
The Kenmore Ultra Mini Sewing Machine is versatile, handling various fabrics with ease. For lightweight materials like cotton or silk, use a sharp needle and standard settings. Heavier fabrics, such as denim or canvas, require a heavy-duty needle and slightly loosened tension. Delicates like chiffon or lace benefit from a fine needle and shorter stitches. Always test fabric scraps to ensure optimal settings and avoid damage. Adjusting the machine’s stitch length and tension can further enhance results for specific textures. This adaptability makes the Kenmore Ultra Mini ideal for diverse sewing projects, ensuring professional-quality stitches across different fabric types.
10.2 Using the Built-In Stitches
The Kenmore Ultra Mini Sewing Machine features a variety of built-in stitches designed to enhance your sewing projects. These include the straight stitch, backstitch, and decorative stitches for embroidery or embellishments. Each stitch serves a specific purpose, such as reinforcing seams or adding aesthetic details. To use the built-in stitches, simply select the desired stitch using the stitch selection dial or button. Always refer to the stitch chart in the manual for guidance. Experimenting with different stitches on scrap fabric can help you master their application. Proper stitch selection ensures professional-looking results and versatility in your sewing tasks.
The Kenmore Ultra Mini Sewing Machine is a versatile tool for all sewists. Follow this manual to optimize performance and create beautiful projects. Happy sewing!
11.1 Summary of Key Points
The Kenmore Ultra Mini Sewing Machine Owners Manual provides a comprehensive guide to operating and maintaining your machine. It covers essential topics like threading, tension adjustment, and basic sewing techniques. The manual also includes troubleshooting tips and maintenance advice to ensure optimal performance. Key features such as built-in stitches and portability are highlighted, making it ideal for various sewing tasks. By following the guidelines, users can extend the machine’s longevity and enjoy a seamless sewing experience. This manual is a valuable resource for both beginners and experienced sewists, offering clear instructions and practical advice.
11.2 Final Tips for Optimal Performance
To ensure your Kenmore Ultra Mini Sewing Machine performs at its best, always follow the recommended maintenance routine and cleaning schedule. Use high-quality threads and needles suitable for your fabric type. Regularly check and tighten any loose parts, and store the machine in a dry, cool place when not in use. Keep the manual handy for quick reference, and explore the built-in stitches for creative projects. By adhering to these tips, you’ll extend the machine’s lifespan and enjoy consistent, professional-quality stitching. Happy sewing!